Introducing our new Crochet Basics Shop
|
|

|

|
|
Just click on the picture or the link on the navigation bar above.
Crochet Help
Crochet Help gives you important techniques that are necessary to complete your crochet projects . . . the right way. You can start crocheting without learning these skills, but they are all necessary to crochet. They will help your work be easier and cleaner.
If you think about it, you’ll be putting a lot of time and effort into your projects, right. So, you’ll want to have the best results possible when you finish. By learning these skills, you’ll get that great result! And, you’ll get there with a lot less frustration. Trust me!
Please, take the time now to learn all that's here in Crochet Help.
Recognizing the Front and Back
The right and wrong sides, also called the front and back, look very similar to each other. With some patterns, you’ll need to work specifically on the right or wrong side of your piece. It will be important to know which is which.
The front is the side that’s facing when you crochet your first row. If you’re unsure, look at your foundation row (foundation chain). The chain is easier to see on the front side. It’s much less obvious on the back.
 Front |
Back |
Crochet Help
Be sure to remove the marker or waste yarn when your project is finished.
Until you are able to recognize the difference, it may help to mark the front side. You can do this either with a stitch marker or by attaching a piece of waste yarn to a stitch.
You can attach the waste yarn with your hook or with a tapestry needle.
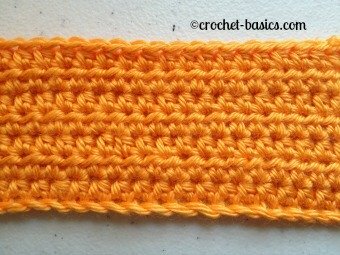
Extra Loops
Extra loops are also called free loops. They are created when stitches are worked in the front chain of the previous stitches.
 |
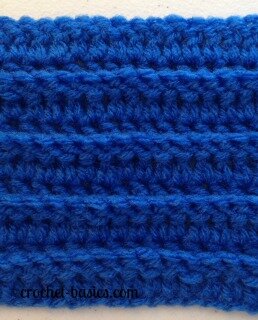
Working in these front loops will create a "line" in your finished work. |
|
Some patterns will have you go back and work additional stitches in the free loops that were created. |
|
|
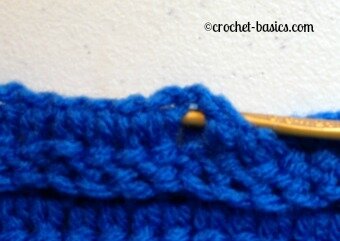
When you do work into the free loops always insert your hook up through the bottom. |
Since we're talking about working in the front of the loops of a chain, let's also talk about working in the back loops of the chain. What happens then?
|
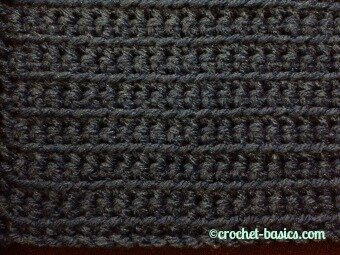
Working in the back loop of the chain will create a ridge in your work. This will give your piece some texture. |
|
|
It creates free loops, too! There will be a line of stitches on the ridge that can be worked just like I showed you above. |
Different patterns will have you work in certain loops to create different end results. They can be a lot of fun.
Working Front and Back Posts
There are patterns that tell you to work around the posts of stitches from the previous row. These are sometimes worked to create patterns or texture within the crochet piece.
Instead of inserting your hook into a stitch on top of the previous row, you’re going to insert your hook around the post of that stitch.
|
They can be worked around the front of the post. Front post stitches always go from the front around the back of the post and return to the front. |
|
They can also be worked around the back of the post. Back post stitches always go from the back around the front of the post and then to the back again. |
 |
 |
In patterns the abbreviations for these are fp (front post) and bp (back post). Then it’s usually combined with the stitch you’re working on; for example, fpsc (front post single crochet) or bpdc (back post double crochet).
Blocking
Blocking is used to shape a crocheted piece once it’s finished, which gives it a sharper look. This can be done either after washing your project or by dampening it with water or steam.
Always wash your project according to the care instructions on the yarn label.
Lay it out on a flat surface and pin it to the accurate measurements. Your pattern will usually give you finished measurements to go by. Let it air dry completely before removing the pins.
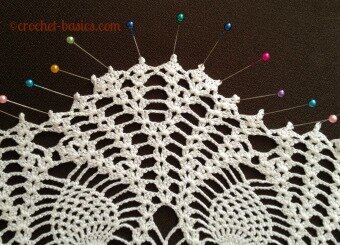
Some projects will need to be stretched more than others. For example, doilies made of super fine weight thread will probably need to be stretched and pinned quite a bit, especially the points and details along the edges. Vests made of worsted weight yarn will not need a lot stretching.
A Little Crochet Help . . .
Please realize that blocking will not fix bad fitting projects. Adjust the size of your piece by using the right gauge.
Felting
Felting is not necessarily a crochet help that you must have. It is a fun finishing process. It is used quite a bit, though. So, it will be very helpful to know.
It is accomplished by agitating items made of wool in warm soapy water. This agitation will cause the yarn to change into a dense, fuzzy fabric.
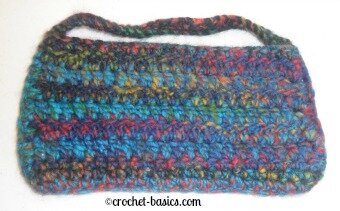 Before |
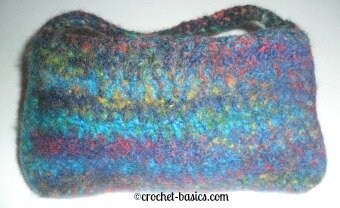 After |
The easiest way to do this is in your washing machine, although you can do it by hand.
Felting can be used on any wool project but I’ve see it used most in purses, hats and slippers.
Place your item in a pillowcase and tie the end closed or use a rubber band. Put the pillowcase in your washer with a pair of jeans. This will cause more agitation and you’ll get better results.
Use your hottest temperature setting and the smallest amount of water. Stop the machine before the cycle ends and check the progress. If it needs more, just start the cycle over again. Check about every 5 minutes. When you have the desired felting, lay it flat to air dry.
You’re learning a lot and doing so great! Keep working through all the crochet essentials. Remember, they’re all important to good crochet.
Now go from Crochet Help to Crochet Gauge and continue learning.
Crochet-Basics Buzz
Sign up for our newsletter and you'll be up to date on all the latest buzz.
Sign Me Up
Recent Articles
-
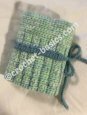
Crochet Basics Shop
Aug 07, 18 01:53 AM
The crochet basics shop is where you can purchase e-books, patterns and supplies.
-
Crochet Hat Pin-Cushion Pattern
Aug 07, 18 01:48 AM
You'll love this little crochet hat pin-cushion pattern. It's simple and fun and makes a great gift.
-
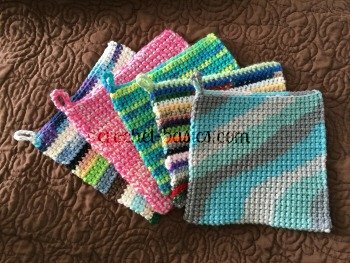
Crochet Coaster Pattern
Aug 07, 18 01:36 AM
You'll love this crochet coaster pattern. It's quick and easy and lots of fun.