Reading Crochet Patterns
Reading crochet patterns doesn’t have to be frustrating or difficult. Once you learn the crochet terms and abbreviations, you’ll find that reading those patterns isn’t as hard as it first seemed.
There are 2 kinds of crochet patterns, written and charts or graphs. Written patterns have all the instructions for the rounds or rows, written out in word form. Charts and graphs are written with symbols in a diagram of the pattern. We'll discuss both.
Always read through your entire pattern before beginning. That way there won’t be any surprises and you can address any questions before you start.
Some patterns will have both written and charts. Charts and graphs are becoming more and more popular. They take up less space to print and using symbols is usually clearer.
As with everything else, you’ll soon discover which kind you prefer. I really like having both actually. It helps reading crochet patterns to see the pattern.
There may be patterns that use only one type. So, you’ll want to learn to read both.
All Patterns
This information is true for almost every pattern, whether it's written or a chart. Remember, though, patterns will vary because different people are writing them and everyone has their own way of doing thing.
At the very beginning of pretty much every pattern you will find lots of very useful information. Don't skim over this section of your pattern. There could be important things here to note while reading crochet patterns.
Reading Crochet Patterns Help . . .
Reading crochet patterns doesn't have to be confusing. Take a little extra time to become familiar with your pattern before starting.
Size and Finished Measurements: You'll find the size(s) and finished measurement(s) for you project here. This is especially important if it's a pattern for clothing.
Materials: This will list the suggested yarn and the amount needed to finish the pattern. It will also give the suggested crochet hook size.
Sometimes these are listed under “Materials” sometimes they’re listed separately as "Yarn" and "Crochet Hook".
Gauge: The gauge size and stitches to work for your gauge will be here.
Other Supplies: This is a list of additional supplies you’ll need to complete your project; for example; darning needle, buttons, safety eyes
Pattern Stitches: This will list any stitches used in the pattern that are either not very common or not used as often. It will also tell how to make them.
Make sure that you understand these stitches before you begin your project. It will save you time and possibly frustration later when you're in the middle of your project.
Special Instructions: Some patterns will give you special instructions for completing your project. example: 3 chains at the beginning of each row count as the first dc.
Instructions: This is where the all the instructions are given whether in a written pattern or a chart.
Reading a Written Pattern
Reading crochet patterns means you'll have to get used to a lot of abbreviations. They are used a lot in written patterns, especially.
Most designers will use the most common crochet abbreviations. However, they can sometimes vary from pattern to pattern.
Reading Crochet Patterns Help . . .
Be sure to read through the abbreviations listed with your pattern before you begin to be sure that you understand all of them.
Quite often you will find a list of the abbreviations that will be used in your pattern. This is especially true if there are some that aren’t as well known or used as often.
The Craft Yarn Council of America gives us a Crochet Abbreviations Master List to help us out.
|
|
Source: Craft Yarn Council of America's www.YarnStandards.com
Written patterns also have standardized terminology that most patterns will use. They do this to try and make reading crochet patterns a little easier and to save space. Here are a few things to remember.
Square Brackets [ ] - These are used when instructions need to be repeated or when more than one stitch will be worked into the same stitch or space.
Asterisks * - These can also be used when instructions need to be repeated. For example, a pattern will tell you to repeat from *. So you would go back and find the * and repeat all the instructions from there. Or, it could tell you to repeat from * to *. This would work the same as the brackets, repeating everything within the asterisks.
Round Bracket ( ) – Round Brackets can be used in a couple of ways. They are sometimes used within the patterns, just like square brackets.
These are also used to give you extra instructions or tell you the stitch count at the end of a row or round. For example; (18 half double crochet).
Capital Letters – Capital letters are generally used to represent different colors of yarn. They may be in alphabetical order; A, B, C. Sometimes, though, they represent a word, such as CC for Contrast Color and MS for Main Shade. Some patterns will even use both.
A pattern will tell you which letter goes with which color at the beginning where it lists the yarn needed.
Here’s an example:
- 1 ball #102 Bubblegum (MC)
- 1 ball #144 Sugarplum (A)
- 1 ball #158 Pineapple (B)
- 1 ball #148 Popsicle Blue (C)
Now that we've gone over all the crochet terminology and the crochet abbreviations, let’s walk through reading crochet patterns.
Here’s a small sample of the pattern:
Row 2 (RS): Ch1, sc in first dc; (sk 2 dc, 5 dc in next sc, skip next 2 dc, sc in next dc) twice; turn. Rep Rows 1 and 2 until work measures approx. 21 ½”, ending with Row 1. Fasten off.
- So, we have row 2, right side:
- Chain 1
- Make a single crochet in the first double crochet (from the previous row)
- (Skip 2 double crochet -from the previous row-
- Make 5 double crochet in the next stitch.
- Skip the next 2 double crochet -from the previous row-
- Make a single crochet in the next double crochet -from the previous row-)
We need to do everything in the round brackets twice.
- Turn work
- Repeat Row 1 (not in our example) and Row 2 until our work measures approximately 21 ½”. Measure from the beginning of your work to the last row worked.
We also need to be sure that the last row we work is row 1.
- Fasten off
Reading Crochet Patterns Help . . .
Don’t be afraid to break each step down in this way until you become more familiar with reading crochet patterns.
Reading a Symbol Chart
Symbol charts can take some getting used to, especially if you’re used to reading written patterns. However, symbol charts give you a visual of how your pattern will look in the end. That can be really helpful to see the end result before you begin.
I find at times, that I jump back and forth between the two types of patterns, reading through the written instructions first and then checking the chart to see if I understand the layout correctly.
Or if the written directions weren't quite clear, the charts can clarify things, or the other way around, too.
Most symbols are pretty standard.
However, as with written patterns, symbols can sometimes vary between patterns. Be sure to read through the symbols before you begin.
Here are the Crochet Chart Symbols from the Craft Yarn Council.
Here are a few explanations to help you along.
Multiple symbols - There are a few symbols that represent the same thing. Such as "+" and "x" both represent single crochet. Also a black dot and a filled in black oval both represent slip stitch. It will depend completely on the author of the pattern as to which one is used.
Groups of Stitches
|
Some symbols are grouped together into a “V” shape. These indicate stitches that need to be worked into the same stitch of the previous row. These groups add stitches to a row. |
The picture above shows 2, 3 and 4 dc stitches worked into one stitch.
|
A tent shape “⅄” indicates several stitches that are worked in different stitches of the previous row that are then completed by drawing yarn through the top loops of all the stitches. This will decrease the number of stitches in a row. |
The picture above shoes 3, 4 and 5 dc stitches worked together.
Written patterns will state it like this: dc3tog, dc4tog, dc5tog (double crochet 3 -stitches- together, etc.)
Bobbles, Clusters, Puffs and Popcorns
|
This shows 5 dc stitches in a popcorn stitch. |
The symbols for these stitches will often look a lot like the stitches themselves. Bobble, cluster and puff symbols are generally the same symbol. Popcorn stitches will have an oval or a curved line at the top. |
Picots
|
This symbol is 4 chains with a slip stitch. |
Picots are a certain number of chains that are worked off a stitch and then slip stitched back to the same stitch. It basically makes a circle with the chain stitches.
|
Bullion Stitch
|
The symbol for a bullion stitch looks a lot like a dc symbol except it has a semi-circle half way down the line. |
Reading Crochet Patterns Help . . .
Don't confuse the bullion stitch with raised stitches. Raised stitches have the semi-circle at the bottom of the line.
Crossed Stitch
|
Symbols that are crossed show stitches that cross either one or more stitches. |
These show a dc crossing over the dc before it, a dc crossing over the 2 dc before it and a tr crossing over the tr before it. (There's also a chain stitch between the 2 tr.)
Spike Stitch
|
Vertical lines going down from a row of stitches show where the hook should be put to make the spike stitch.
|
Post Stitches
|
Post stitches are made by working around the post of stitches from the previous row. A post stitch is shown by a vertical line with a curved end. If the open end is to the left then it is a front post stitch and is made on the front side of your work. If the open end is to the right then it is a back post stitch and is made on the back side of your work. |
Front/Back Loops
|
Some stitches are worked into the front or back loops of a stitch. This can be shown in a couple of ways. One way is light horizontal lines under the stitch for a front loop and a dark horizontal line for the back loop. Some patterns show a curved line under the stitch. If it's curved on top, it's for a back loop. Curved under is for a front loop. |
The Craft Yarn Council can give you a little help reading crochet patterns as well.
Don't feel like you have to memorize all this information. Bookmark this page and refer back to any time you need a little extra help.
Remember, the more you work with patterns the easier and clearer it will become.
Now you're ready to start learning Crochet Basics.
Crochet-Basics Buzz
Sign up for our newsletter and you'll be up to date on all the latest buzz.
Sign Me Up
Recent Articles
-
Hyperbolic Crochet
Feb 08, 18 03:22 PM
I found a website, https://www.math.cornell.edu/~dwh/papers/crochet/crochet.html that is very informative. I think it is interesting but I have not tried
-
Interlocking Crochet
Apr 25, 17 07:58 PM
The pattern is reversible and appears different on both sides.
-
Crochet Star
Feb 07, 17 04:50 PM
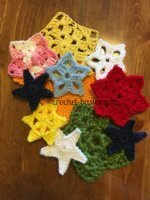
Crochet stars are fun for any time of year. Here’s a walk-through of my favorites.
©Copyright 2013-2018
All rights reserved.
Nothing on this page is public domain.