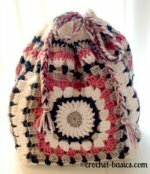
Crochet granny squares are so awesome! I know you’ve seen these little gems. They have been around forever, I think. They are used in just about every kind of project that you can think of, from blankets to hats to belts. They can be incorporated into just about any pattern.
Granny squares are actually made crocheting in the round. That’s right; you’re making a square by crocheting in circles.
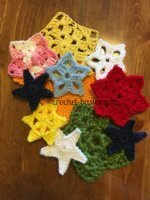
You give them the square shape by creating corners in your rounds. You can actually make other shapes such as triangles and hexagons, as well.
These little squares are perfect for beginners because they really are easy to create. They’re loved by all crocheters, though. Here are just a few reasons why.
You can create different patterns just by changing your yarn colors.
They’re a great way to use up yarn scraps.
They’re easy to carry with you and work on wherever you are.
They can be used in just about any project.
There are endless variations and patterns.
They are fun and addictive.
There really are many, many different designs to the granny square. I’m going to walk you through the true, basic crochet granny square. This is the classic, the one that started them all.
Looking for a little bit of a twist on a crochet granny square? Here's a walk-though of the Crochet Granny Triangle.
ch 3 (counts as first dc here and throughout pattern)
Work 2 dc into ring
*ch 2
Work over the yarn tails as you go to keep things neat and to save time later.
3 dc into the ring*
Repeat from * to * 3 times
ch 2
Join with a ss in the top of the beginning ch 3
Fasten off (leave about a 3 – 4 inch tail)
You can now start to see your little square forming. The chain 2 spaces are the corners.
Round 2
Join second color in the second chain-2 space BEFORE the join of the first round.
[ch 3
All in the same space:
Work 2 dc,
ch 2,
3 dc]
First Corner
Everything in the brackets [ ch 3, all in the same square; work 2 dc, ch 2, work 3 dc] is a FIRST CORNER. That’s how I’ll refer to it throughout the pattern. So, when this pattern calls for a “first corner” this is what it refers to.
*ch 1
In next chain-2 space:
Work 3 dc,
ch 2,
3 dc*
Corner
Everything between the *'s (ch 1, in the next chain-2 space: work 3 dc, ch 2, 3 dc) is a CORNER. When this pattern refers to working a corner, this is what it means.
Repeat from * to * 3 times. ~4 corners made.
ch 1,
Join with a ss to the top of beginning chain 3.
Fasten off
Round 3
Join third yarn color in second chain-2 space BEFORE the join of round 2.
This pattern carries throughout the entire granny square. Each corner has 3dc, ch 2, 3dc that are worked into the ch-2 space. Each ch-1 space has 3dc worked in it. Each cluster is separated by a ch-1.
Round 4
Join fourth yarn color in second chain-2 space BEFORE the join of round 3.
You can continue to add as many rounds as you’d like. Just follow the same pattern on each round.
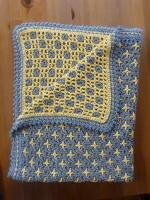
Crochet granny squares can be worked in any color combination, including all the same color. Traditionally, though, these are worked in different color combos with the last round of a set of squares worked in the same color Doing this will give your granny a little frame and make them easier (and neater) to join.
You can see in the picture above just how much it changes the look of your granny square just by rearranging the colors.