ATTENTION: There has been some confusion lately about whether we are hiring and/or associated with Mr. Warren Johnson. Neither of these things are true. This website IS NOT a part of his scam. We are working on the problem but in the meantime, please report any emails you get.
Crochet Granny Triangle
A crochet granny triangle is a great twist to the original granny square. So, if you love crocheting granny squares, then you’ll love making triangles just as much.
They can be sewn together to make circles or squares or whatever you want. They can also be worked into all different kinds of projects, like purses, clothes, and afghans.
There are many variations of triangles, giving you different angles to work with. Different angles will make the triangles fit together in different ways and form unique designs.
There are several things that will affect the size of your triangle. Here’s a few to keep in mind:
Remember, you can use whatever works best to get your desired result. Don’t be afraid to try different things.
- Using different kinds of yarn
- Different sized hooks
- Your tension
- The number of rounds you work
This walk-through is for a basic crochet granny triangle with all the sides and angles equal. For you math geeks out there, this will make an equilateral triangle.
Crochet Granny Triangle
If you are using worsted weight yarn with a size G hook and you work 7 rounds, your granny triangle will be about 7 inches on each side.
|
Start with a magic ring. |
Round 1
|
Chain 6, (This counts as 1 dc and a ch-3 corner space) |
|
*Work 3 dc into ring, Ch 3* |
|
Repeat * to * once more |
|
Work 2 dc into ring |
|
Ss into 3rd chain of original ch-6 Tighten ring to get the size hole (or no hole) that you want. |
|
Fasten off. To keep things neat, you can weave in ends after each round. I usually do it every other round. Do what works best for you. You should have a tiny, adorable triangle. |
Round 2
With a new color, pull loop through any corner space.
|
Chain 6 (For 1 dc and ch-3 space) |
|
Work 3 dc into ch-3 space, Ch -1 Be sure to work over your yarn end with these 3 stitches. It will help hold it in place while you work the round. |
|
*In the next chain space, work 3 dc, Ch-3, 3 dc, Ch-1* |
|
Repeat * to * once more |
|
In 1st chain space corner, work 2 dc |
|
Ss to 3rd chain of original ch-6 Fasten off and weave in ends. You should have:
|
Round 3
With a new color, pull loop through any corner space.
|
Chain 6 |
|
Work 3 dc into ch-3 space Chain 1 |
|
*In next ch-1 sp work 3 dc Ch 1 (side cluster) |
|
In next corner space, work 3 dc, Ch 3, 3 dc, Ch 1* (Second corner) |
|
Repeat * to * once more |
|
In next chain space, work 3 dc, Ch 1 |
|
In 1st chain space corner, work 2 dc Ss to 3rd chain of original ch-6 Fasten off and weave in ends. You should have:
|
Round 4
With a new color, pull loop through any corner space.
|
Chain 6, Work 3 dc into ch-3 space, Chain 1 |
|
*In next ch-1 sp work 3 dc, Ch 1 (side cluster),
In next ch-1 sp work 3 dc, Ch 1 (side cluster) |
|
In next corner space, work 3 dc, Ch 3, 3 dc, Ch 1* |
|
Repeat * to * once more |
|
In next ch-1 sp work 3 dc,, Ch 1,
In next ch-1 sp work 3 dc, Ch 1 |
|
In 1st chain space corner, work 2 dc, Ss to 3rd chain of original ch-6. Fasten off and weave in ends. |
Rounds 5 - 7
Repeat Round 4, adding in 1 extra cluster to the sides with each round.
|
Round 5
|
Round 6
|
|
Round 7
|
After Round 7 you should have:
|
You can also make this crochet granny triangle in all one color. You’ll just need to ss to join at the end of the round and then continue with the chain 6 without fastening off.
You can also experiment with 2 colors or 3 or 4. There’s so many variations you can try.
|
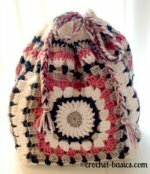
Do you need a project idea? Here is a great one from Ann Rousseau on Ravelry. |
Crochet-Basics Buzz
Sign up for our newsletter and you'll be up to date on all the latest buzz.
Sign Me Up
Recent Articles
-
Crochet Granny Square
Feb 06, 17 04:46 PM
Everyone loves crochet granny squares! Learn how to create them with these step-by-step instructions.
-
How To Crochet
Feb 06, 17 04:30 PM
In How to Crochet you’ll find super easy projects with how-to instructions from start to finish. Each has lots of pictures to help along the way, too.
-
Crochet Heart
Feb 06, 17 04:15 PM
Crochet hearts are wonderful to have for any project and so easy to make.
©Copyright 2013-2016
All rights reserved.
Nothing on this page is public domain.